It’s the new XP-PEN Artist 22 2nd Gen graphics display tablet from their ever-expanding range getting the MyTabletGuide review.
With an actual screen size of 21.5”, this is a graphics/pen display for use by illustrators, designers etc, whether they are amateurs, hobbyists or professionals… or anyone who buys it for that matter!
It’s not a standalone device like, say an iPad, it needs to be plugged into an external device like a PC, Laptop, Mac, Tablet or Mobile – you then draw on the screen with the provided pen. Right, lets get started…
The device is housed in a white box, both sides containing bright, impressive images; one side has a furry little creature looking rather surprised at a flower, whilst the other side has part of the flower imagery incorporated into a letter ‘A’ shape… the ‘A’ taken from ‘Artist’ presumably…
Opening up the well-packaged unit we find a white box of accessories and the pen display cased in foam strips. Removing the display reveals the stand is pre-attached, which is a handy timesaver. (I’ve seen other tablets whereby you have to install the stand yourself with provided screws, so this is a nice touch!).
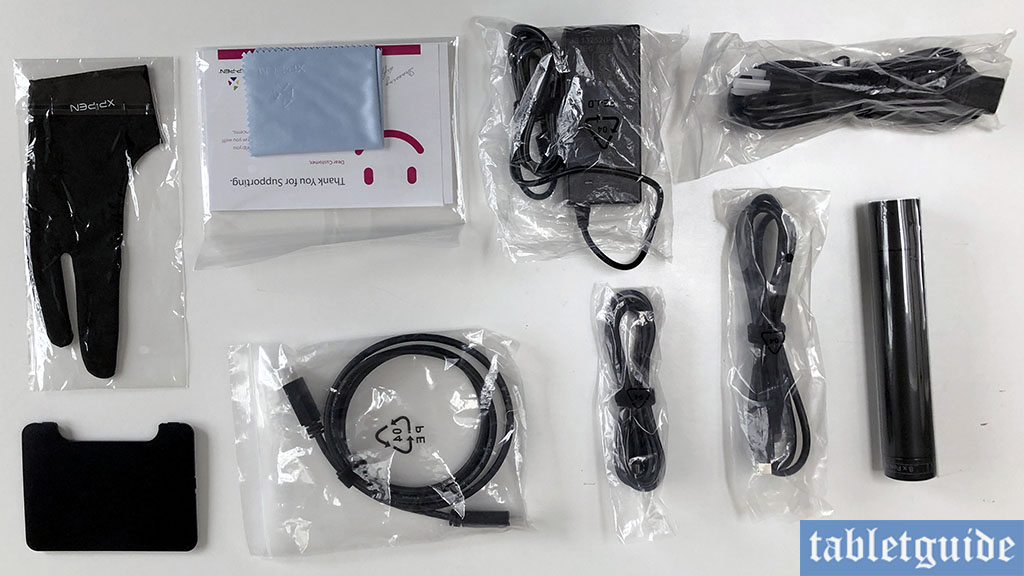
Everything you need to get started is included, such as; USB-C to USB-C cable, Power Cable, HDMI Cable, (Battery Free) Pen/Stylus, USB-A to USB-C Cable, Drawing Glove, Cleaning Cloth, QuickStart Guide, Power Adaptor, Pen Holder (included within are 8 spare nibs).
At 22”, you’re going to need quite a bit of desktop real-estate to accommodate this display! 😊
As with all tablets, you need to uninstall any previous/older driver software from your PC/Laptop, head over to XP-PENs website and download the latest ones from there – I noticed the UI has been updated slightly for this tablet – looks nice, bright and simple to navigate!
This tablet supports USB-C to USB-C connection should your PC/Laptop have this, otherwise you’ll need to use the provided HDMI and USB-A to USB-C cables.
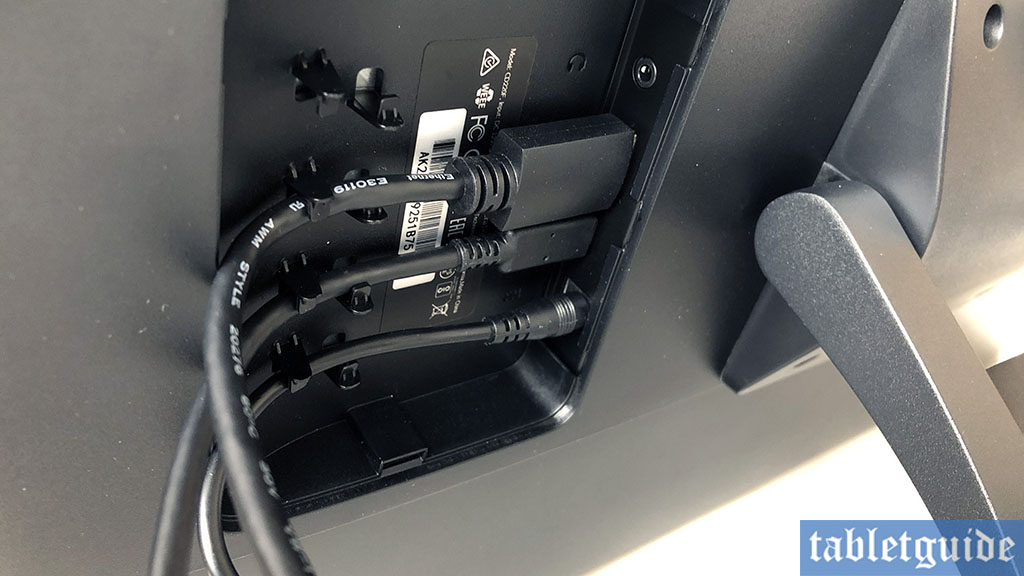
Speaking of cables, for the back of this device XP-PEN has provided a great in-built ‘cable tidy’ – you can ‘click’ your cables into the connectors (after plugging them in) and cover them all with a plastic flap/covering – not only does this keep them secured, it looks nice and tidy too – great job!
Before using this device, you need to peel off the screen protector – there’s a small sticker at the top left edge labelled ‘Step 2’ – it’s this you peel off, taking the screen protector with it, hopefully! (I presume ‘Step 1’ would be taking it out of the box…? 😊)
Watch XP-Pen Artist 22 (2nd Gen) Review Video
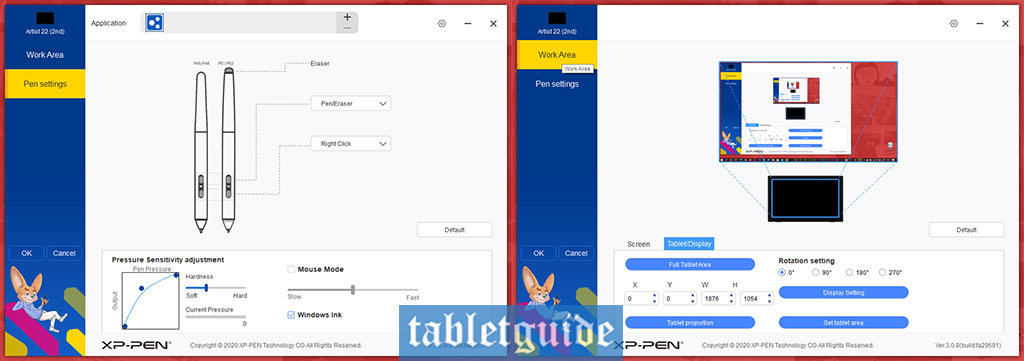
Once all connections have been made, it’s always a good idea to calibrate your device via the driver software – it takes a matter of seconds and entails clicking on 4 corners and the middle ‘X’s onscreen to ensure the pen is correctly ‘recognized’ by the tablet.
Whilst you’re there, you can make other changes to suit the way you work i.e., pen pressure sensitivity, change the functionality of the 2 buttons on the pen, map the tablet to the relevant monitor should you have more than one, rotate the display etc. A handy ‘Default’ button returns everything to ‘factory settings’ should you mess everything up! Click on the logo and you’re taken to XP-PEN’s website for updates etc.

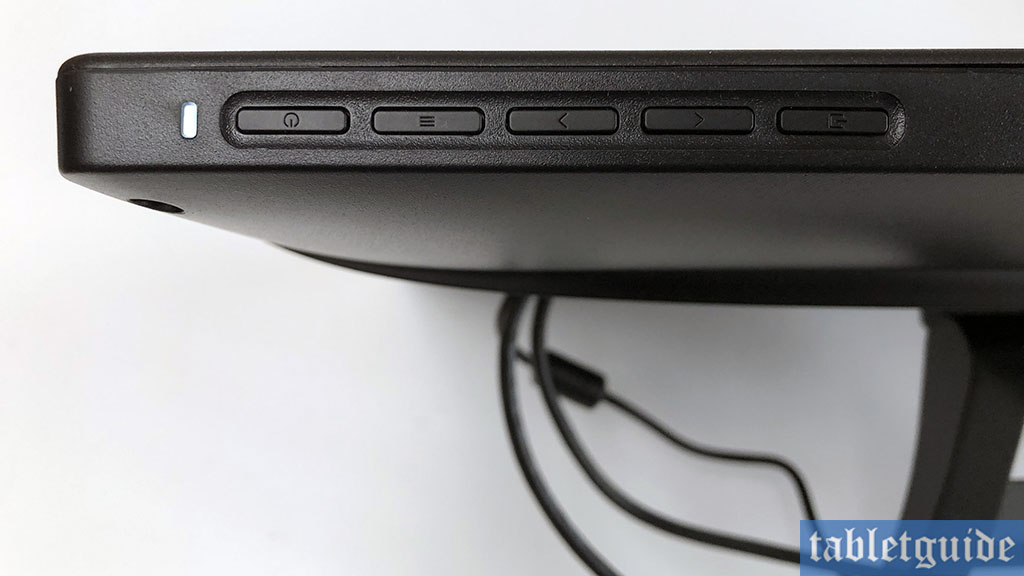
Whilst on the subject of settings, along the top right of the monitor are 5 buttons. These are for turning the tablet on (very handy!), Volume control (for use with any headphones you have plugged in – more on that later!) and Arrow Keys – it’s here you can make changes to the actual monitors display settings like Brightness, Gamma, Color Temperature etc.
This is a Full HD (1920×1020) monitor display with a colour accuracy of 86% NTSC (Adobe RGB≥90%, sRGB≥122%). I couldn’t find any information either online or in the manual confirming this is actually a ‘laminated’ screen, but as you’ll see from the accompanying video, the space between the pen and the ‘ink’ onscreen was minimal, almost non-existent, which may be important to some.
There are no ‘express’ or ‘shortcut’ keys here (you’ll need to use your keyboard), but it has a sleek design look to it with its curved edges and ‘hidden’ buttons. Colors looked nice and bright when in use after first switching on, but I did increase the Brightness a tad as I was working – just a personal preference!
The pen is the standard 2 button type; by default, the top button switches between ‘Pen’ and ‘Eraser’ modes, whilst the bottom acts as ‘Right Click’ – both are customizable in the driver software. It’s quite light, feels good to hold and has a nice rubber-type grip around the buttons. 8192 levels of sensitivity are supported, as is 60° of ‘tilt’, perfect for shading in your artwork.
It’s battery-free pen, so it’ll never need charging, as this is becoming the norm now. The tube lid that houses both the pen and spare nibs has a handy ‘lid’ which doubles up as a pen holder for your desk when not in use, to protect it – cool!
Going back to the monitor(!), the stand is fully adjustable from 16° to 90°, so you’re sure to find a level that works for you. In the recessed area is where you’ll plug in your power cable, USB-C, HDMI and even headphones, as mentioned earlier.
But it’s what the front can do is why we’re here, so let’s start drawing…
For the video of this review, I used Adobe Photoshop as my weapon of choice, and as you’ll see I was able to produce nice variable lines, dependant on pen pressure. Lines tapered off nicely, even when drawing them really fast (the screen has a reported response time of 8ms).
Laminated or not, when looking ‘straight on’, the onscreen cursor/pointer was exactly where I’d expected it under the pen. I shot a ‘close-up’ from the side too in the video to show just how ‘close’ they are – it makes drawing more intuitive and realistic an experience.
Drawing on a device this size is great – even though ‘only’ 1920×1080, onscreen palettes and menus don’t get in the way when you’re creating. If you’re looking for 2K or 4K monitor, this isn’t for you, but any larger screen with its higher resolution is going to come with a higher cost too! It’s nice to able to view the whole illustration and/or design you’re working on without having to scroll up and down or pan-around everywhere whilst working.
Hmmmm… I tested this monitor with headphones and was able to control the volume with the OSD, but no sound came out of the monitor once I unplugged them…? There are two small round ‘things’ on both sides of the monitor, but I’m pretty sure they aren’t speakers… again, there is no mention of them on the website or manual, so I don’t know what they are!
The Artist 22 2nd Gen supports Windows 10/8/7 and Mac OS X 10.10 (and higher). It is also compatible with popular digital art software, such as Adobe Photoshop, Illustrator, FireAlpaca, CDR, SAI, Krita, GIMP, MediBang, and Blender 3D.
I liked working on this tablet, but did encounter a strange ‘glitch’ from time to time, which did hamper my working on the illustration. Whether or not this was due to my laptop’s memory (or some other technical issue), or perhaps it was related to XP-PEN’s driver (as stated, the UI is new, so it may be a bit ‘buggy’), but anyway, every now and again, when coloring in large areas with the ‘Brush’ tool, there was a slight ‘lag’ onscreen as the brush colour ‘caught up’ with my pen stroke, before a small delay then a giant ‘flick’ of ink shot up to the top of the canvas, leaving a big line onscreen. Several ‘Undo’s later I was able to carry on, but it repeated quite often… I’ll maybe give XP-PEN the benefit of the doubt on this one, but I’ve not encountered this phenomenon before with other tablets on my testing laptop. Just thought you should know! 😊
Solution: After some researching, I found the cause of the weird brush pausing/link flick – unticking ‘Windows Ink’ fixed the issue.